3D Space

The first week of the second semester we learned how to add 3D objects in Nuke. To view the objects we also added a camera and view it in 2D.

To move the camera around the scene we went to camera settings and set the key in Translate X. Then we moved the camera and set another key. The see the camera movement we went to 2D and press play.

Camera Projection
First method
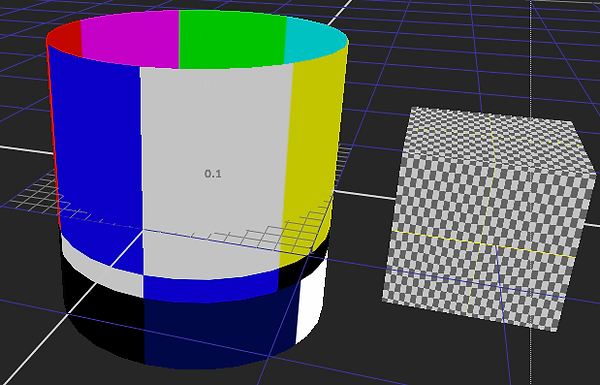
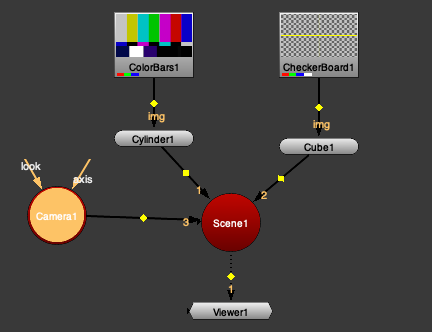
In the next exercise, we brought a cylinder and the image into the scene. We brought in ready Render Camera (camera moving forward). The idea of this exercise is to apply the picture on the cylinder to create a 3D tunnel view.
We rotate the cylinder to make it look like a tunnel. We also scale that up (to make it wider). The next step was to duplicate the Render Camera, change its name to Project Camera and connect it to the Project 3D node. So far we got the tunnel and the camera move, but it doesn't create the illusion of the camera moving through the tunnel. To fix that, we created a static frame at frame 1001 and turn off the animation for Translate X and Rotate X.

Second method
In the second method instead of duplicate Render Camera we brought to the scene Frame Hold and set the first frame to 1001. We connected it to the Project 3D and Render Camera. To get rid of the black hole we scaled up the cylinder (Scale Y).

To view the camera we changed from default to Camera1 view.

Camera Projection & Roto
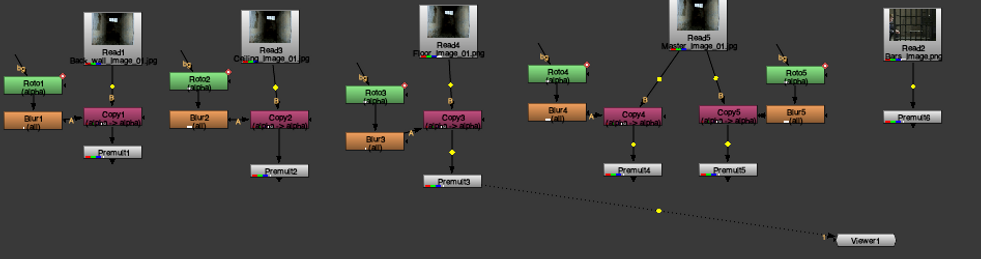
The next exercise was to build the prison using 2D images. We brought 5 picture into Nuke. We Roto each wall (front, sides, ceiling and floor). We had premade Render Camera and Project Camera. After we cut out all the elements we had to use the Project Camera. After the Premult we brought Project 3D, create a dot, connect it to Project 3D and Projection Camera. To keep it clean in dot settings we selected hide input to remove the pipe. We copy and paste that across. To connect the copied dots we Shift + select the dot + Camera Projection + Y.

After we have done that, we brought the Card node. The image was projected to that card. We resized that card to make the image fit to the card. Next, we brought the Scanline Render node + dot and connect it to Render Camera. We repeat that process with every other card. We renamed the card to keep it clean and easy to stay organised. To view everything together we Merge all the images.


3DEQUALIZER
3DEqualizer is the industry-leading tracking solution. Artists from the world's foremost VFX houses rely on 3DE to deliver consistent and measured results on major projects. This software is much deeper than a 'One button solution' and offers the level of control which high-end visual effects demand.
Original Video
For this formal assignment, I have to work in 3DEqualizer and Nuke.
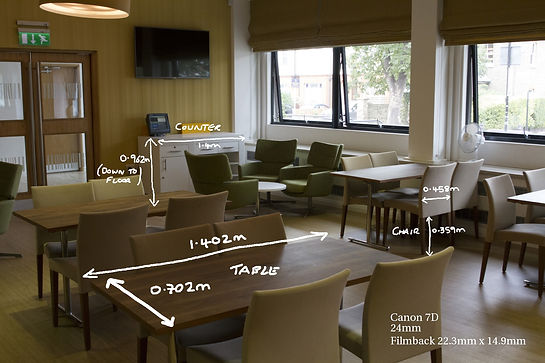
First of all, I uploaded the original video in 3DEqualizer and set all the camera setting provided from the picture. I begin the tracking process, it takes around 2 hours. I track more than 80 points but end up with 40 as not all of them were good enough. To keep the right proportions of the video I track the two points on the corners of the white cabinet which represents the width 1.40m.

Tracking Video
Although the Tracking process is quite long and requires precision, it is not that difficult. Back to the project, the next step I move on to is turning on Deviation Browser. At first, all the numbers are above 36 and the numbers I am looking for is below 1. To lower the number I double click on the line under the Lenses. In the settings, I select Camera on the bottom tab, then Camera Constraint and select Fixed Camera Position Constraint. I close the window and press alt + C to Calc all. In the Calc window, I select Use Result. The numbers in Deviation Browser drop-down, but still remain higher than 1. I go back to Lenses window, change Dynamic Lens Distortion to 3DE Classic LD Model and Adjust Focal Lenght. In the tab on the bottom, I am going to Windows and


Parameter Adjustment Window. In that window, I remove Filmback Width and Pixel Aspect. I am leaving the Brute Force and click on Adjust. After the Calc numbers in Deviation Browser drops down. I am going back to Lenses, keep it on Classic LD Model and tick the box with Distortion and Quartic Distortion. I am going back to Parameter Adjustment Window, delete Focal Lenght, click on Adaptive All and Adjust. Again alt + C and Use Result. Now the numbers drop down below 1.

At this point, I add more information to the scene. As I mention before I track two points on the white cabinet with the width. In 3DEqualizer I change the Manual Tracking view, alt + left click + Shift the two tracked points. I jump to 3D Orientation view, click on Constraints and type in the distance 1.40m.

Now the information is attached to the scene.
In the next step, I place the locators on the scene. To do that I select 3 tracked points on the floor, go back to 3D Orientation, Edit, Align 3 Points, XZ Plane.


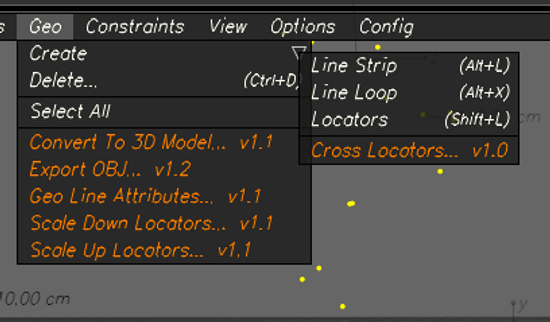
Now I set up the Origin point. I select 1 of the 3 points I selected before, then Edit, Move 1 Point to and Origin. Now I am ready to place the locators. I select all the point, go to Geo and Locators. I scale up the locators.


After locators are done I move forward and place the Cube in the scene. To do that in 3D Orientation view go to 3D Models, Create and Cube. Now the object is the scene. The next step it to snap the Cube to the point. I select the Cube and the point on the floor. In 3D Orient view, click on 3D Models and Snap To Point. I rotate the Cube to make it looks like it is on the floor. I also scale it up.
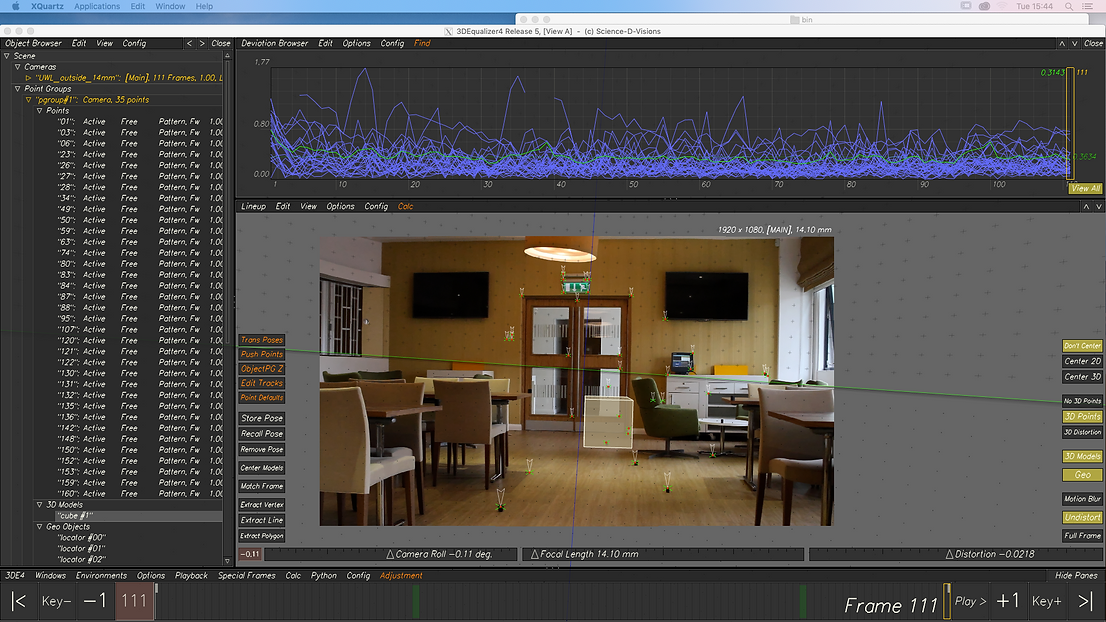
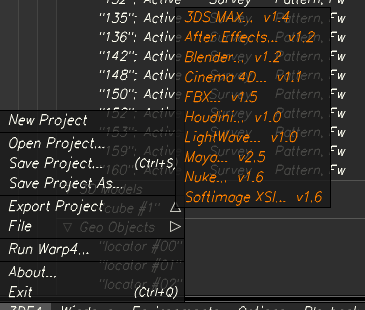
The last step in 3DEqualizer is to Bake the project and save it as baked, then bring Locators, Geo Object and Camera to Nuke. I preprepared the folders to keep everything organised. First I export the project, click on 3DE4, Export Project and Nuke v1.6.


Final Video
Maya Projects
I am currently working on a few Maya projects for the next Assignment. Due to the situation we are in, we can't work in Nuke nor 3DEqualizer.
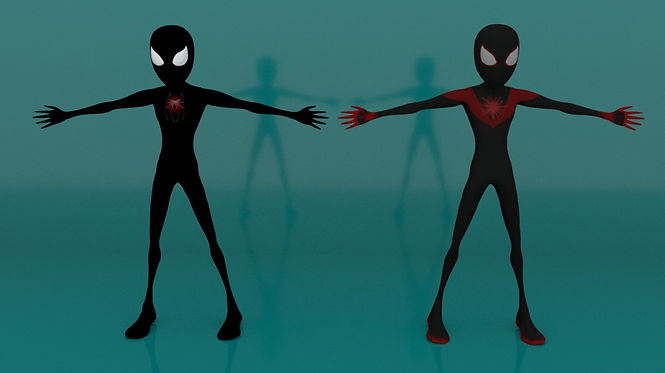
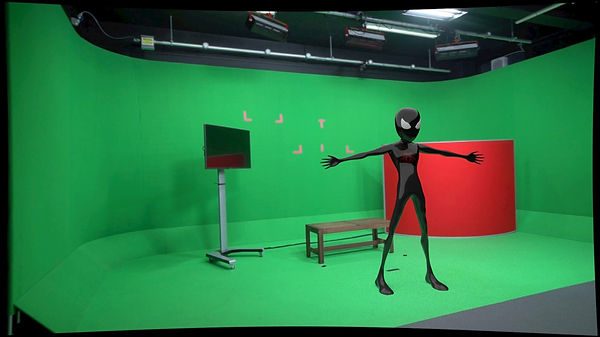
Spider Man

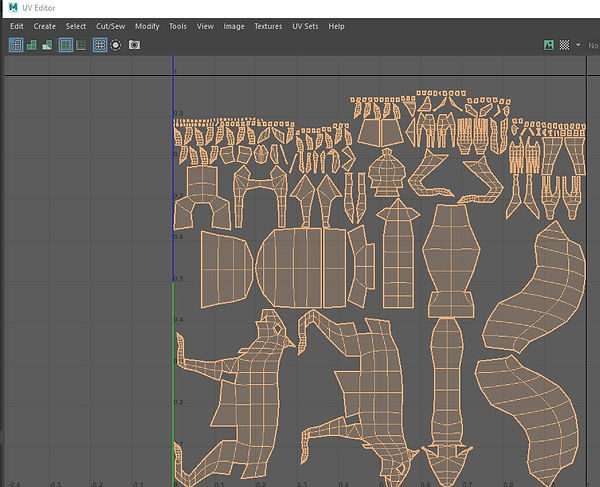
I brought the reference image into Maya scene and model half of the body. I used vertices to model the sphere. I copy one part of the body and connect it. I merge vertices. I exported the project to ZBrush to add more details. From ZBrush, I moved to Maya again to create UV. After that, I exported the project as OBJ to Substance Painter.

UV


Renders

.jpg)
Flowers
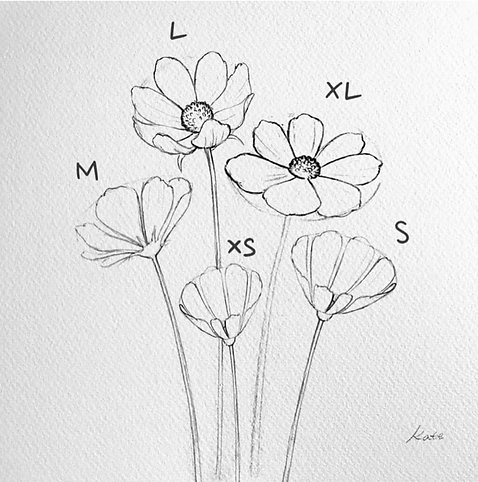
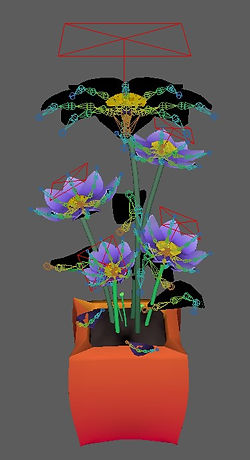
I model one leaf and add joints to it. I duplicate special the leaf to create a flower. I used the reference image to keep everything inaccurate size.
Leaf

Reference Image

This project was pleasant and relaxing for me. I forgot to take screenshot of the workflow although I have few recording and the final render.
Playblast
ZBrush Turntable
Final Render
Squirrel
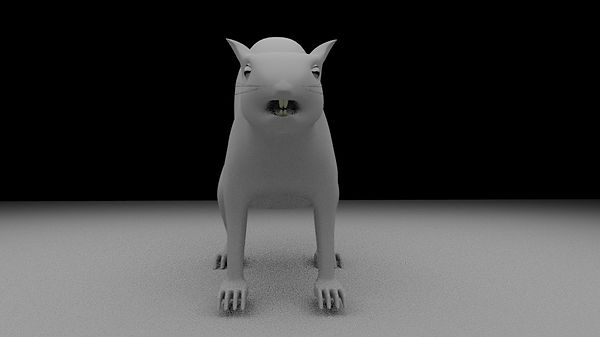
The last model for my assignment is going to be a squirrel. I was looking for ideas to make something realistic. I always wanted to model an animal. I am currently working on this project, I struggle with fur. I want to make it as realistic as possible but I never used XGen in Maya before.
Reference Image

I will also create a skeleton for the squirrel and make it walks around the assignment scene. I made the moving eyelids and open mouth so the squirrel will also blink and open and close mouth.


Renders without fur


Eyelids
Flowers
For the first out of three objects, I placed flowers in the scene. I model and animate flowers in separate Maya scene, then I imported, scale and place it on the bench in the assignment scene.

Spiderman
When I was about to cut the chicken dance take in Animation editor, something happened to the skeleton and now Spiderman is frozen. In Human IK window it shows hand is not assigned. When Im trying to assign the hand it breaks everything.

Squirrel
I am still working on the Squirrel project. I managed to add joints and fur. I am currently Grooming the fur and next step will be animating it and adding to the assignment scene.
Joints


UV and Map
To create the XGen fur, I had to create UV. I didn't want the fur on the bottom of the legs, so I have to create a mask and paint the area where I didn't want fur. It wasn't

accurate and there were few pieces of hair left. To remove all the fur completely I export the mask to Photoshop and paint the area with the leftover hair. I saved the mask in .iff format and upload it in Maya.
Fur


List of the brushes I used so far. I am going to add more hair to tail to make it looks fluffy.
I continued working on the fur. There are few spots with missing fur, but it is hard to work around that area because there are many small faces and it is difficult to draw a perfect mask in Photoshop.
Clump
Fur texture


The final outcome for XGen. At the very end, I added two layers of a clump to give the fur the natural look. I also added noise but lower it to a minimum.


Final Renders
I managed to fix all the issues with the projects. All the objects placed in the scene stick to the ground. The issue with the Spiderman appeared after I added an animation. To fix that I had to slightly move the animation skeleton, not the actual Spiderman. It was an easy move but took me a couple of days to figure it out.
Unfortunately, I had to use the previous version of the Squirrel project. I was working on it in the separate Maya window after I imported it to the Assignment file Squirrel was too small and I couldn't scale it up with the fur. in this case I used the project I had saved before I added fur and joints.