Nuke
On today's lecture, we learned a few basic tasks in Nuke. One of them was how to Merge [M].
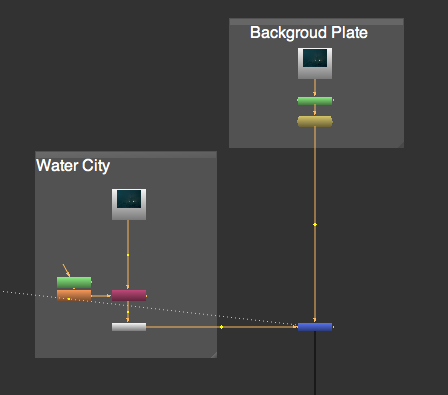
The task was to Merge pictures in the right order to receive the complete picture. To create Merge, make sure nothing is selected then press [M]. The icon will show up on the grey background. It has two arrows (A and B). The blue icons on the right-hand side of the pictures are the Merge icons. All A-lines are connected to Background Plate. B-lines are connected to:
1. Additive Key (hair detail)
2. Soft Edge Blend
3. FG Plate (green screen)
To see the progress I clicked on the Merge box then 1.
To complete the task, I connect all Merges one by one,
using the bottom arrow.


Rotoscoping
What is Rotoscoping? It transfers an image from the live-action film or video into another film sequence. For example "Alice in Wonderland". Kathryn Beaumont gave a live-action reference for Alice character.

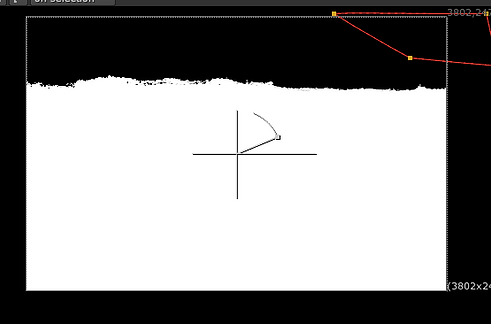
We used Rotoscoping to select an object. In this case, it was a top of the roof one of the buildings. Frame by frame we tracked the building. I used Cusped Bezier to draw the shape around the object.
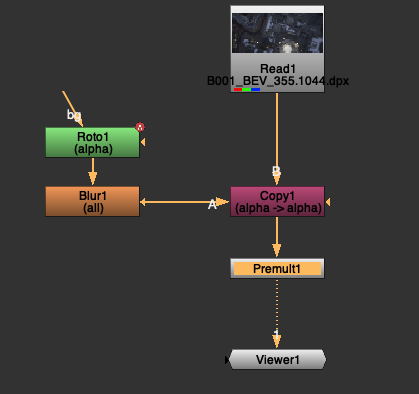


I played around with the Color Correct to make the picture brighter.


We were Rotoscoping moving fingers. Pictures on the left present how I selected thumb. Picture with the red thumb shows the mask [M]. I divided fingers into 3 sections, it makes it easier to track the movement.
The panel below explains how I changed fingers colour. It also shows what tools I used to divide fingers. The three lines next to "Life" controls blur tool.

Video below is the work I have done during the class.
Keying
Keying is one of the fundamental compositing skill. The term 'Keying' means selecting parts of an image to remove. Keylight is a colour difference keyer, which means that for it to figure out a key, it compares every pixel in the image against a single colour.
Garbage Mattes means something that is garbage in the scene (people, lightning, etc).
Luma Key
In this exercise, I swapped the sky from the first picture to the second. I was cutting the sky in alpha channel, using roto.

Picture 1
The sky I want to place in the second picture.

Picture 2
The original picture.

Pictures below show Picture 1 without the original sky. The photo on the right is the same picture but in alpha channel.

The final outcome with the graph with all the actions I took.

This is an example of what Keyer does.

The second exercise was more complex. I had a short video of woman on a green screen and I had to place her on a different background.


Advanced Keying
At the beginning of the lecture, we referred to a previous task. To keep stuff organized we learned how to create a Back Drop. On the keyboard, we hit Tab + Backdrop. The picture on the right is what appeared.
After that, we went back to the task with the lady on green screen. As you can see in the video above, her hair does not have many details. To add some more hair details, we downloaded an Additive key. We also removed green leftovers.


Here is the before and after. The picture on the left has many green areas especially at the edge of the hair. Also, her face has a green tint. By using Despill Madness we removed all that green from the picture. The Additive key added hair details. The final result look very realistic.


Grain and Noise
On today's lecture, we learned about grain and noise. The picture on the right is an example of grain.


We used a brush and eraser to draw on the picture above. On the picture on the right, I used a roto mask to select a square where I wanted to paint.
Tracking


The next task was to remove the yellow squares from the screen. To do that I clicked Tab + Rotopaint. Next step I clicked on the sampler then on the left side I double click on the window with the circle to get a circle with a cross inside. I clicked on the clone option and I brush the area with the yellow square (sample the green colour and paint it on the yellow). The method is similar to cloning in Photoshop. The circle with a cross inside sample the green colour and the empty circle paint on the yellow square with sampled green.
That was just the first step. The next step is to track the yellow square through the video.
I hit Tab + Tracker to add a Track node. Then in Tracker settings, I clicked on add tracker. On the top of the screen with the girl, I clicked on the play button to track the full video. After that in Transform settings, I clicked on Transform, match-move-1-pt. In Rotopaint settings on the right in the clone section, I have changed to all frames. Back to Tracker in Transform, reference frame, I set it to the current frame (first frame of the video). The last step was to copy from Tracker settings translate x,y to translate in Rotopaint and the same with the centre from Tracker to Rotopaint. To do that I clicked alt + wave icon on the right next to the parameters.


The second part of the lecture, we worked on the next video. We removed the guy from the top left corner. The pipeline below shows step by step how did we achieve that.
The original video
Work in progress
As you can see there is a square I Roto from the scene where the man is not visible.
The final video
Clean up
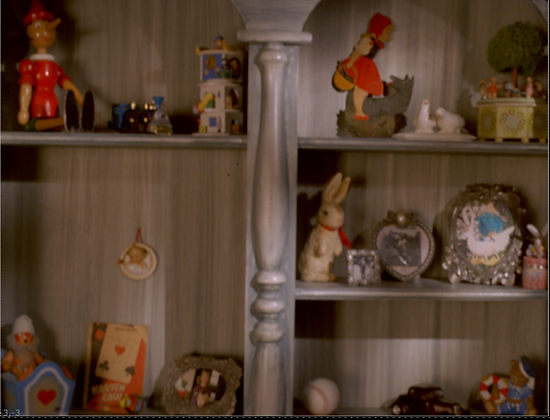
Today's lecture we were removing the boat, drifting on the water. The trick was, the surface wasn't still. Here is the quick note I take during the lecture of the process I have made to remove the boat.


The picture above shows what we were working on. At this stage, I tracked forward the selected fragment, because that was the part of the video where there was no movement.

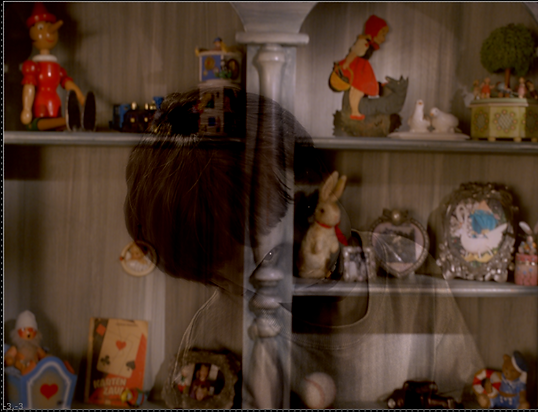
At this stage, I used Roto to select small patches of water, track them and cover the unwanted boat. I covered the rope as well. I also used a blur to make the edges smoother.


The final video
The next task was to remove the group of people. The process was similar to the task with the boat. Although it was a bit easier because of the tiles in the square are not moving.


As before I tracked the selected area where was no movement. I Roto the people and use the clone paint tool to paint on the area where they are standing. I used fether to smooth the edges.


The final video
Remove logo

We learned how to remove and add a new logo in the place of the old one. We used all the techniques we learned so far.


This is the part where I added the new logo.
The original video
The final video
Assignment

In this task, we had to remove the pink marks, change the background colour, remove the logo from the suitcase and add the picture on the tv screen.
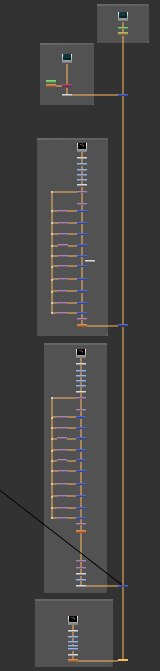
The pipeline below is all the actions I made.

The final video