Domino Effect

Today's lecture, we learned how to make a domino effect. The first thing we did, create a single cube and duplicate it 40 times with small gap in-between.
I also create a floor and walls.
The next step I selected all the dominos, create active Rigid Body and change Collider Shape Margin to 0.001. To stop dominos from falling, below the ground, I made floor passive Rigid Body. I changed Collider Shape Type to Mesh and Body Type to Static Body.

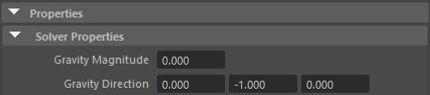
Domino slowly started to fall. I wanted it to look realistic, so I changed the gravity to -980.000. In Channel Box/Layer Editor I modified the dominos Mass to 0.1. In bulletSolverShape, I changed Internat Fixed Frame Rate to 240Hz.


So far domino was standing still. The next step I selected the first domino in line, in bulletTigifBodyShape, Initial Conditions I changed Initial Velocity to -2.000.
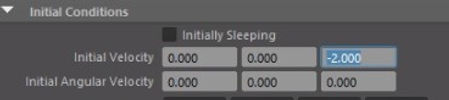
Because I changed the gravity now the domino was standing still again, I had to change Initial Velocity from -2.000 to -20.000.


Final render
nCloth
Today's lecture, we learned how to make a nCloth. First of all, I model a Plane and Cylinder. I changed from Modeling to FX. With the Plane selected, in nCloth setting, I selected Create nCloth. I rotate the Plane and scale up the Cylinder to make it looks more like a flag.
Flag
To connect Plane to Cylinder I clicked on Plane and choose the Vertex mode. I click and select 3 Vertices on the top and Shift + select on the Cylinder. In nConstraint settings, I select Point to Surface. I did the same with 3 Vertices at the bottom of the Plane. In the nucleus, Gravity and Wind I changed the Wind Speed to 10.000.
nClothes
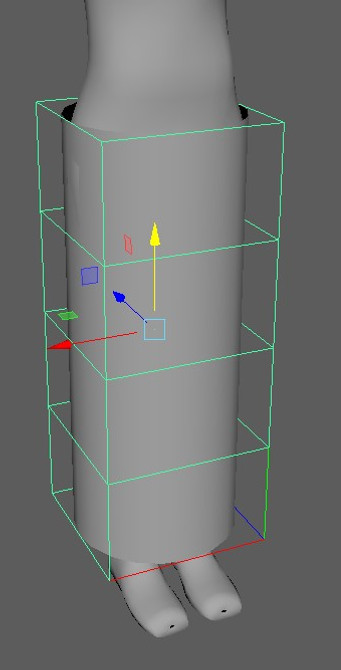
Our next task was to create a long skirt. First of all, I model a Cylinder, and from the top view, I scale it to the right proportion. I added the Subdivisions Axis and Height. I deleted top and bottom faces from the Cylinder. In Modeling settings, I used Deform - Lettice options. Using Lettice Points, I scaled the skirt. I made a skirt as nCloth, in Presets I changed it to Silk. I nConstraint the top Vertices to the body (Point to Surface).


nCloth tear apart


I started the project by creating polyPlane 24x24. I moved it above the grid. With the polyPlane selected I went to settings and clicked on nCloth, Create nCloth.

Next, I select polyTorus and scale it. In Edge mode, I selected all the outside lines from polyPlane. I Shift + Select on the Torus and in nConstrain options, I clicked on Point to Surface.


Now when everything is connected, I created nParticles

I change polyPlane Presets to Chiffon. In Particle settings I changed Radius from 0.200 to 0.500. In Dynamic Properties, I set the Mass to 10.000.

To make the polyPlane rip, I clicked on it, change the mode to Vertex and select few in the middle, exactly where I wanted to rip it.

nParticles
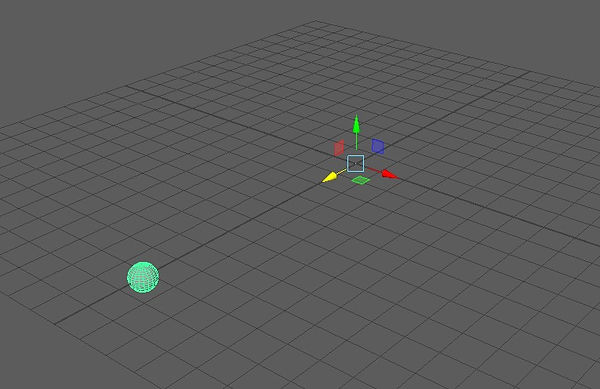
I started the project from adding polySphere into the scene. I moved the ball on the right and clicked Ctrl + G, to keep the Pivot Point in the middle and also create a group. I created a start and end keyframe for the group. I also set up the values in Transform Attributes.


I added nParticles to the ball. In options, I selected nParticles, Emit from Object, Edit, Reset Settings and Create.
I added a Volume Axis field and scale it up so the Sphere with the Particles was inside of the box.


I added a Volume Axis field and scale it up so the Sphere with the Particles was inside of the box.

I set Away from Center to 0, so the Particles stay within the box. I also changed the Turbulence and Turbulence Frequency. In Particle Size I made the Radius smaller. In Shading settings, I changed from Points to Sphere.


I set the Colour settings for the particle. I also changed the Colour Input to Normalized Age. In Colour options I made it extremely shiny, for better clarity on render.
Final Render
Fluids


Assignment

For this project I used my tree assets, I modelled during the summertime. The idea for this project was to make a tree the main focus point.
I made leaves, using the nCloth method that was part of this assignment. I also added birds with a simple bend animation on their wings, flying above the tree. The original idea was to use particles and attach birds to it. Unfortunately, it cost multiple Maya crashes, instead of particles I used MESH to control birds.
I slightly animated the main tree and the little trees in the background, to add windy expression to the scene.
I used a ready asset for the ground downloaded from Megascan website. I also used a texture from that website, as I found many which fit the scene perfectly.
The last touch to the project was water. I applied an HDRI Heaven Image to SkyLine.
Leaf


I used Photoshop for the leaf image. I also made an alpha image for it and attached it in materials setting to give the leaf transparency on the Plane.
Tree

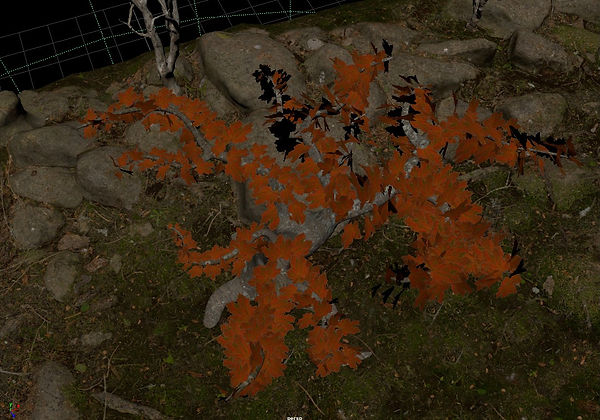
After I made the main Plane with a leaf texture I copied it and place around the benches to create that leaves crown. Next step was to make all leaves as a nCloth. I made ground as a Collider. I added the wind to the scene from left to right, to blow the leaves from the tree.
Birds


I used one bird, then in MESH settings I increase the number of birds to 10-15, I attached them to the Circle and play with the variation of their movement.
Lake


For the lake, I created a simple Poly Plane and increased the number of squares. In BOSS settings I added that Plane in Wave Solver and ground to Wave Influences. I made water transparent, to match the colour to the water from the HDRI image.
Final Render
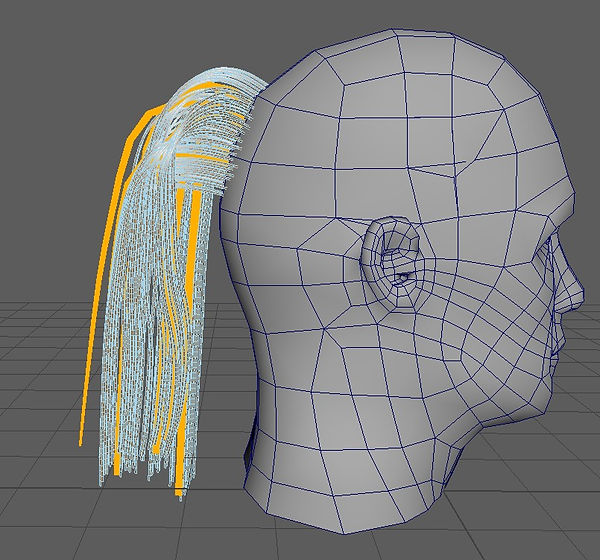
XGen

I started the project from creating a Plane and I attached a Noise to it. I model a single mushroom, model it and add texture. To make the Mushroom filed I used XGen.
Mushroom


Alien Mushrooms

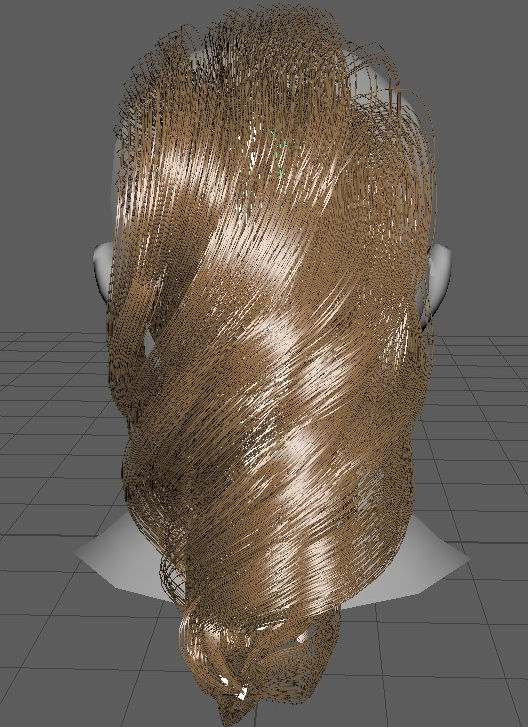
Hair

I started this scene from setting XGen hair properties.
Hair Progress


Graphs


Final Shape

Water Project
This is a realistic project. I used a YouTube video as a reference. I model all the object, trying to keep the right scale. I also placed the camera in the correct angle like on the original video. I also model the walls on the side, so when I added a light to the scene I got the accurate shadows.


Reference images I used for bottles of soap on the sink.

Scene set up Maya view.


Light
I tried my best to fit the light colour to same as on reference video. I also moved the light around to match the light direction on the scene. Unfortunately, it is not clear where the source of light is exactly.
Original Video
Final Render
Fire Project
This project was more complicated than the water project. I used the ready campfire model and pieces of wood. I downloaded them from Megascans website. To create the fire I used Bifrost Graph. I struggle with the fire colour at the very bottom of it.

Megascan models

Bifrost Graph Editor


Original Video
Final Render
Figure Project
For this project, I used a Megascan Statue with a texture. I made it as a Liquid and the ball as a collider. I animated the ball to go through the object. The idea is to give the statue water consistency and after the ball breaks through it the object goes back to its original shape. I used the Liquid Mesh and applied the texture to it. Unfortunately, the Liquid Mesh has so many faces and the material is not clear.
To make the object goes back to its original shape I used the Motion Field. I also had to disable the Falloff, otherwise, the splashes did not go back. I turned the Gravity off so the water does not fall down.

Megascan Statue
Liquid


Motion Field


Mesh