Digital Matte Painting
Photoshop


Savannah Scene
Our first task was to create a Savannah Scene based on The Lion King.
Breakdown
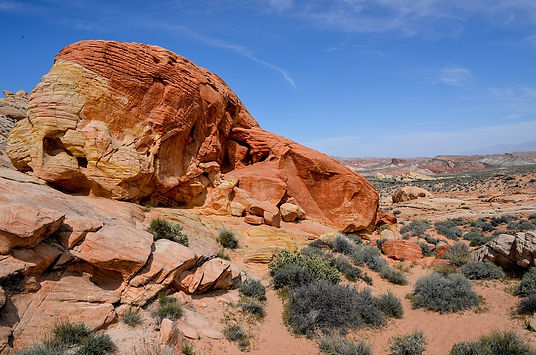
I used Google Image for reference images. I searched for high-quality pictures to get the best results. My main idea - yellow grass, dessert rocks, palms and light blue, clear sky. I also found a lion king. It was the biggest struggle to place it in the grass. Here are the reference images I used.
Rrocks
Trees

Grass

Sky

Lion

Final outcome
To create this scene I used Photoshop. I cut out selected objects from reference images and place them in the right order in the scene. I used a couple of Photoshop tools such as Blur, Brightness, Healing Brush, Clone Tool, Lasso etc.

Breakdown Video
To make a breakdown I used Adobe After Effects. I used the Linear Wipe 100%-270% left dot and 0%-270% right dot.

City


I was playing with the sky and city in the background.
Reference Images


Breakdown Video
I used the same technique in Photoshop as I used for Savannah. This time to edit the video I tried Adobe Premier Pro and I actually found it easier than Adobe After Effects.

Skyfall View

Reference Images


Breakdown Video
WALL-E
Colour Palette

In my project, I am going to based on colours from the colour palette. It seems like those colours domain in Wall-E Pixar movie from 2008.
Mood board

Concept art
This is the basic idea of the project. After taking a second look at the concept art I draw, I am coming to the conclusion that I will make the building definitely higher than I drew.

Background image

Shots

Reference image for my project.
Road


Basic idea

Texturing
Original Image

Colour Correction


Final Render
Brekdown
Christmas Advert
Project Pitch 1 Coca-Cola
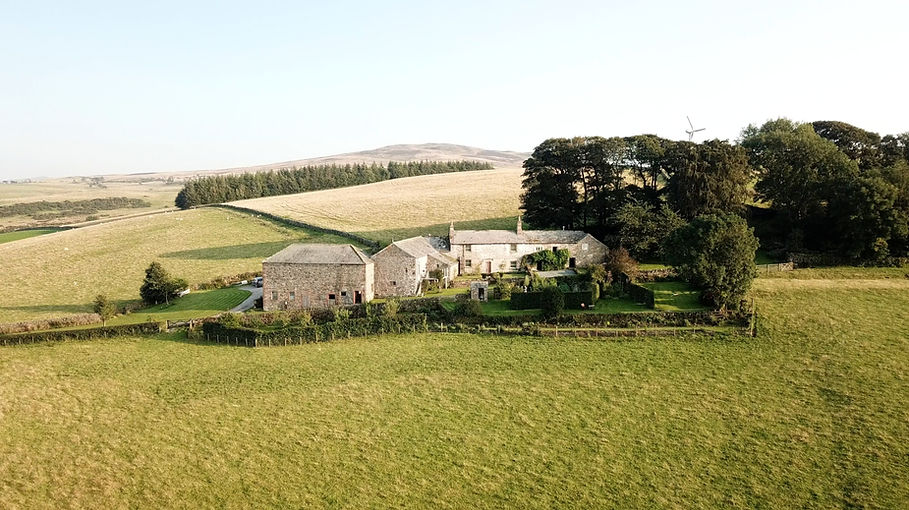
My project idea is to start with the village view. For the village, I will use the Florian video. In Premiere Pro I will change its look. It will be during the night. The camera will be slowly zooming out. There will be a table, on the table Christmas globe, blurry background (image). Music will start playing from the first frame. I will do all 3D models in Maya + Cameras. I will do two Cameras. First for the Village, second for the crystal ball. In Christmas, the globe will be a mini-village, that the camera just zoomed out. Next to the globe bottle of Coca-Cola making a toast will the globe. I will also add snow particles in Nuke or Maya.
Village ideas


Main Christmas object


Music
Snow Globes Coca-Cola 2010 Christmas Commercial HD
Colour Palette


.jpeg)
Project Pitch 2 Car
The second project idea and the main object will be a car advert. I will use Florian's video and turn it into a winter scene. After the zoom out from the Village I will model a door and add a knocking noise. The main scene I will focus on will be a back yard from Florian's video when the car will be placed. I will use Maya to create the scene, and Israel car model as the main asset. I will also add snow particles. I will place the red Christmas bow on the front of the car. I will use the Mercedes logo to give the car a brand.
Village

Christmas door


Final Project Pitch
I and Eazreal decided our brand product for Christmas advertisement is going to be Lamborgini. Based on our previous ideas, we agreed to start the advert with 4 seconds of Florian's village video. Then I will model the door with Christmas decoration. It will be the second step of the advert, we are also going to add a knocking sound to it. After that, we will move to the main scene, which is going to be a table with Christmas decoration and snow globe with Lamborgini inside. That will be our main scene. We will use Ezreal car model and place it inside the globe. We will add a snow particle inside the globe. For the lights and background, we will use an HDRI image. After the good presentation of the car, I am going to do a matte painting image in Photoshop with a "Merry Christmas" in the middle. That will be our ending for the advert.
Intro Video
Nuke


I focused only on 100 frames from Florian's video. I also made snow particles in Nuke, but we decided with Israel it looks better without it. I saved ready video in PNG, then I brought it to Dragonframe and reverse the image sequence. Because the main scene is going to be in the house, instead of zooming out I reversed it to zooming in.


Premiere Pro
I used snow on green screen video from YouTube. In Premiere Pro layers I added the village video and green screen snow layer above it. I used Ultra Key to sample green screen and remove it from the video.
Breakdown
Video Update

I change the snow. I placed 4 cards with snow in Nuke to give the right depth to the scene.
Maya
Reference Image

Maya Progress
For the second part, I created a door and Christmas decoration in Maya. We wanted to make a connection between the first scene and the last scene, which is the main scene with the car inside the house. For the decoration I used MASH. I created one branch and copied it using MASH. I applied branches to Torus.


Door Render
Final Render
(My part)
Final Render
(My part and Israel)
I am not happy about the opening video I worked on in Nuke. Over the Christmas break, I am planning to make so changes for the final assignment in January. So far this is the outcome of 3 weeks work.
Waterfall Project
For this project, I decided to focus on Bifrost. My main idea is the Waterfall. I will use Maya to create a scene and PremierePro to finish. I am going to use the techniques I learned through the course. I will move the camera from the top of the Waterfall. I want to make the scene as realistic as possible.
Idea of final render

First of all, I am going to track the raw video of Tianmen Mountain, in China (image below). I will track it using Nuke. Next, I will export the tracked scene to Maya, recreate the scene and add a waterfall. The video I found is in 4K Ultra HD, so I hope for a good outcome. I will finish all up in PremierePro, I am also looking forward to adding a falling water sound.


Raw Video
Nuke

I tracked the scene in Nuke, using Camera Tracker node. The video is in 4K Ultra HD after I Solve the Error value was below 1 what was good enough for pretty accurate trackers. To Export all the locators and Camera, in WriteGeo node I selected the file location and set file type to FBX. It created an FBX file, which I dragged and drop into Maya.


Maya

I imported the track scene to Maya. It helped me to place the waterfall in the right position and scale. Primary I wanted to make a couple of waterfalls, unfortunately, it was caching and rendering for too long so I decided to make only one. I rendered I on the black background so I could edit if faster in further process.
Playblast from work in progress in Maya.
Waterfall render.
Smoke for the waterfall.
After Effects
For this project, I decided to composite everything in After Effects. I also used Premiere Pro to cut the length of renders.

Original footage combined with waterfall and fog.

Original video with waterfall, smoke and sky.
Final Render
The final project with the colour correction I did in After Effects. To correct the colour I used Adjustment Layer and added Tint and Curves.