Intro to Mocap

On the first lecture of the second semester, we learned how to create a skeleton which we could move. We imported a skeleton mesh into Maya and create a Quick Rig Character. Then step by step we attached all points in the correct spots and create joints.
We imported video files to Maya.


The second part of the lecture we moved to the classroom with a green screen scene. We learned how to set up the scene and how and where to place white markers on the costume.
After taking a few recordings in green screen classroom I imported one of them to Maya. I deleted in Outliner: System, Unlabeled Markers and green crosses from the

scene. I selected the creature behind Skeleton Mesh, Select, Hierarchy. In Channel Box/ Layer Editor I selected Rotate X, Y, Z and change all of them to 0. Then I changed Rotate X to 90. In Human IK window I change from Skeleton to None and select Create Character Definition. After I set up all body parts, the Skeleton was ready. I changed its name to Vicon.


Mocap session
We split into 3 groups. Each group was setting the scene and getting the actor ready with all the markers. We had a lot of fun but it was professional at the same time. Here are some materials from that lecture.
Vicon setup - Marker placement


With James help, I placed all the markers.
Vicon Shogun setup


Andrea was walking around the scene, which we set up at the very beginning (on the edges). She was making circles in the air with Wand (stick with the red lights). James present to Isreal moves, he has to do to set up a correct view in Shogun.
TAKES
We recorded over 20 TAKES, which we are going to use in our assignment. Here are some examples of our ideas.
Moonwalk
Basketball
Shooting
Mocap to Maya
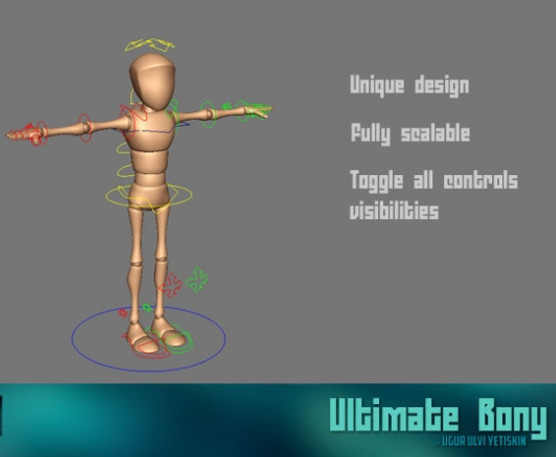
For this formal assignment, I used Bony Rig. At first, I created the Human IK skeleton and hands for the Bony. I deleted all the controls it has.


The second step, I imported one of the Mocap Takes, we recorded on previous lectures. The second skeleton appeared on the Maya scene. I selected in by Hierarchy and changed its Rotate X, Y, Z to 0. Then I clicked on the scene and back on the skeleton. This time I changed Rotate X to
90. My next move was to Create Character Definition. I connect all the body parts and lock it. To make everything work properly in Character I select Skeleton and Source Vicon. Now Bony was connected with the Take from Mocap.
Moonwalk
Render

I set up the scene for the Rendering. I added a Sphere and light to the scene, I also changed Bony colour to make him more visible. I noticed his right arm is slightly bent, but I wasn't able to fix it at this stage.
Final Render
Hands


Assignment
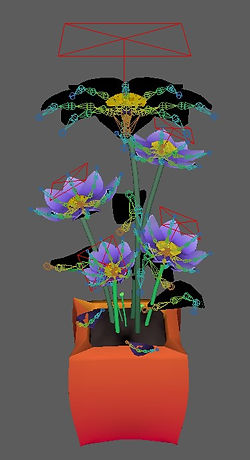
For the final assignment, I decided to use a couple of models I have made myself. Originally I wanted to add multiple dancing skeletons to the scene and one awkward dancing character I made myself, but the scene was crushing and rendering was taking ages. So I stick to two characters in the scene and animated flowers. This simple scene took me over 15 hours to render.
Flowers
I model one leaf and add joints to it. I duplicate special the leaf to create a flower. I used the reference image to keep everything inaccurate size.
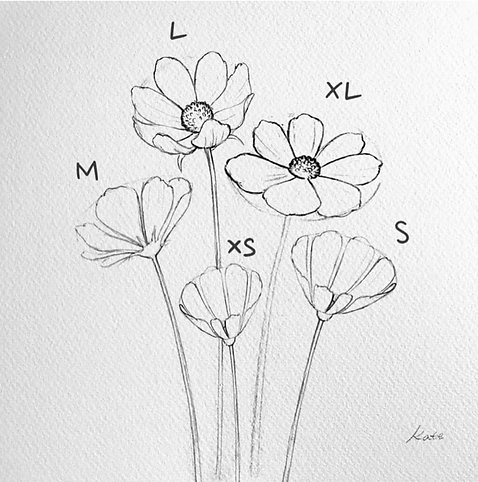
Leaf

Reference Image

This project was pleasant and relaxing for me. I forgot to take screenshot of the workflow although I have few recording and the final render.
Playblast
ZBrush Turntable
Final Render
Spider Man

I brought the reference image into Maya scene and model half of the body. I used vertices to model the sphere. I copy one part of the body and connect it. I merge vertices. I exported the project to ZBrush to add more details. From ZBrush, I moved to Maya again to create UV. I also made HumanIK for this model.

Scene


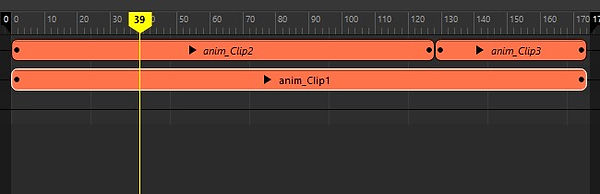


I was playing with the animation graph to get the best results.
To edit the final video, I used Adobe Premiere Pro 2020. The music file, I recorded a few seconds of the song and composite with the video.